Options When Starting the MOBOTIX D15
Using the integrated magnetic switch under the outer shell of the camera allows modifying the startup behavior of the MOBOTIX D15. You can start the camera either using the factory default settings (default IP address) or with DHCP support to obtain a dynamic IP address (provided a DHCP server is available in your network). If you use DHCP support, the IP address and other network data is announced automatically as a voice message.
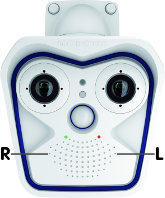
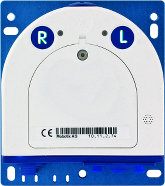
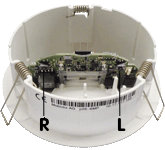
Camera Key of the MOBOTIX D15
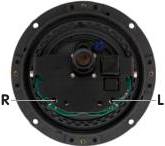
The MOBOTIX D15 only has one "key" that is actuated using the magnet in the back of the custom tool delivered with the camera. Remove the camera's outer shell to reach the key.
|
Key "L" |
 |
 |
|
Starting the Camera Using DHCP: D15
Upon startup, the camera tries to obtain an address from a DHCP server on your local network.
-
If the camera is running, disconnect the camera's power supply.
-
Reconnect the power supply of the camera.
-
Wait until the bottom and right LEDs are lit simultaneously.
-
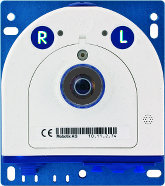
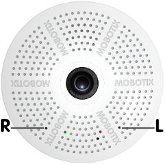
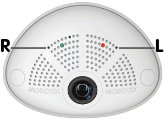
Hold the magnetic side of the custom tool onto the spot labeled button "L" in the figure.
-
Only remove the custom tool when the camera plays a double sound ("Boing, Boing").
Once startup has been completed, the camera automatically announces its IP address, its network mask and its MAC address.
Note
If you would like to have a running camera again announce its network settings, simply hold the magnetic side of the custom tool to the spot labeled "L" in the figure.
Starting the Camera Using the Factory IP Address: D15
You would like to start the camera using the factory default network configuration.
-
If the camera is running, disconnect the camera's power supply.
-
Reconnect the power supply of the camera.
-
Wait until all LEDs are lighting up simultaneously.
-
Hold the magnetic side of the custom tool onto the spot labeled button "L" in the figure.
-
Only release the custom tool when the camera plays a single sound ("Boing").
The camera is accessible again using the factory default settings. Note that the passwords will not be reset if the camera is booted with the factory default settings.
Note
If you use the camera keys to load a configuration, this configuration is not automatically saved. Upon restarting the camera without using the camera keys, the configuration last saved will be used.